Installing ROS2 Humble on Raspberry Pi 5 and Enabling micro-ROS Communication with ESP32 via Docker
July 25, 2024, 9:12 a.m.
After facing some challenges, I finally managed to connect my Raspberry Pi 5 to the ESP32 microcontroller. The goal was to enable communication between the Raspberry Pi 5 and the ESP32-WROOM-32 microcontroller via micro-ROS.
To help others save time, I decided to write this full detailed tutorial, which can be followed in these steps:
- Install Ubuntu 23.10 Server on Raspberry Pi 5
- Install Docker on Raspberry Pi 5
- Create a Dockerfile for ROS2 Humble Installation
- Install ROS2 Humble (in the Dockerfile)
- Install micro-ROS (in the Dockerfile)
- Build the Docker Image
- Run the ROS2 Humble Docker Container
- Build and Flash the micro-ROS Example
- Create and Run the micro-ROS Agent
Installing Ubuntu 23.10 Sever on Raspberry Pi5
First, I installed the Ubuntu 23.10 Server operating system on my Raspberry Pi 5 using Raspberry Pi Imager . This allowed me to connect to the device via SSH without using a screen.
Installing Docker
Once I accessed the Raspberry Pi 5 via SSH, I installed Docker. Since the supported operating system for the Humble distribution of ROS2 is Ubuntu 22.04, using Docker allows for creating a compatible environment on the Raspberry Pi 5. (https://docs.docker.com/engine/install/ubuntu/)
sudo apt-get update

sudo apt-get install ca-certificates curl

sudo install -m 0755 -d /etc/apt/keyrings
sudo curl -fsSL https://download.docker.com/linux/ubuntu/gpg -o /etc/apt/keyrings/docker.asc
sudo chmod a+r /etc/apt/keyrings/docker.asc
echo   "deb [arch=$(dpkg --print-architecture) signed-by=/etc/apt/keyrings/docker.asc] https://download.docker.com/linux/ubuntu \
$(. /etc/os-release && echo "$VERSION_CODENAME") stable" |   sudo tee /etc/apt/sources.list.d/docker.list > /dev/null

sudo apt-get update
sudo apt-get install docker-ce docker-ce-cli containerd.io docker-buildx-plugin docker-compose-plugin
sudo usermod -aG docker $USER
Dockerfile for installing ROS2 Humble on Raspberry Pi5
We can start with a Docker image that already includes the desired version of ROS2. In my case, I preferred to create a Dockerfile starting from the necessary version of Ubuntu, which is 22.04 (Jammy).
FROM ubuntu:jammy

RUN locale  # check for UTF-8
RUN apt update && apt install locales -y
RUN locale-gen it_IT it_IT.UTF-8
RUN update-locale LC_ALL=it_IT.UTF-8 LANG=it_IT.UTF-8
RUN export LANG=it_IT.UTF-8

# Set the timezone
ENV ROS_VERSION=2
ENV ROS_DISTRO=humble
ENV ROS_PYTHON_VERSION=3
ENV TZ=Europe/Rome
RUN ln -snf /usr/share/zoneinfo/$TZ /etc/localtime && echo $TZ > /etc/timezone
The Dockerfile starts with the base image of Ubuntu 22.04. Next, the localization and timezone are configured, which in my case is set to Italy, which are necessary for installing ROS2.
After these settings, I set some environment variables needed to install the ROS2 package without having to input the timezone during the installation process.
RUN apt install software-properties-common -y
RUN add-apt-repository universe

RUN apt update && apt install curl -y
RUN curl -sSL https://raw.githubusercontent.com/ros/rosdistro/master/ros.key -o /usr/share/keyrings/ros-archive-keyring.gpg

RUN echo "deb [arch=$(dpkg --print-architecture) signed-by=/usr/share/keyrings/ros-archive-keyring.gpg] http://packages.ros.org/ros2/ubuntu $(. /etc/os-release && echo $UBUNTU_CODENAME) main" | tee /etc/apt/sources.list.d/ros2.list > /dev/null

RUN apt update && apt upgrade -y
In this part of the Dockerfile, I configure the system for the installation of ROS2 by adding the necessary repository and updating the system packages (for the installation, I followed the official guide available at this link: https://docs.ros.org/en/humble/Installation/Ubuntu-Install-Debians.html).
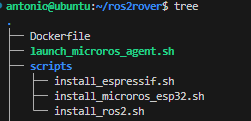
tree of the workfolder
After configuring the system, we are ready to install ROS2 Humble and micro-ROS. I used two scripts: install_ros2.sh and install_microros_esp32.sh, which are copied into the working directory /ros2_project and made executable.
WORKDIR /ros2_project
COPY scripts/*.sh /ros2_project/

RUN chmod +x ./*.sh
RUN ./install_ros2.sh
RUN ./install_microros_esp32.sh
Installing ROS2 Humble
# install_ros2.sh
#!/bin/bash

# Install ROS2 base and development tools
apt install ros-humble-ros-base -y
apt install ros-dev-tools -y

# Configure shell to source ROS2 setup
# echo 'source /opt/ros/humble/setup.bash' >> ~/.bashrc (optional)
echo 'source /usr/share/colcon_argcomplete/hook/colcon-argcomplete.bash' >> ~/.bashrc
Installing micro-ROS
To install and use micro-ROS, you first need to set up a compatible software development environment for the ESP32 chip. I’ve opted for version 5.2, which has been tested by the micro-ROS authors.
# install_espressif.sh

#!/bin/bash

# Check if the 'esp' folder exists
if [ ! -d ~/esp ]; then

    # Update package lists and install required dependencies
    apt-get update -y
    apt-get install git wget flex bison gperf python3 python3-pip python3-venv cmake ninja-build ccache libffi-dev libssl-dev dfu-util libusb-1.0-0 -y

    # Create directory for ESP development and clone ESP-IDF repository
    mkdir -p ~/esp
    cd ~/esp
    git clone -b v5.2 --recursive https://github.com/espressif/esp-idf.git

    # Navigate to ESP-IDF directory and install ESP32 toolchain
    cd ~/esp/esp-idf
    ./install.sh esp32

    # Set IDF_PATH environment variable and make it persistent
    export IDF_PATH=$HOME/esp/esp-idf
    echo export IDF_PATH=$HOME/esp/esp-idf >> /root/.bashrc
    . $IDF_PATH/export.sh
else
    echo "'esp' folder already exists."
fi
# install_microros_esp32.sh

#!/bin/bash
# Run the ESP32 setup script
./install_espressif.sh

# Create a workspace and download the micro-ROS tools
git clone -b $ROS_DISTRO https://github.com/micro-ROS/micro_ros_espidf_component.git

# Install dependecies
export IDF_PATH=$HOME/esp/esp-idf
source $IDF_PATH/export.sh && pip3 install catkin_pkg lark-parser colcon-common-extensions
Build the Docker image
At this stage, our Dockerfile will appear as follows:
FROM ubuntu:jammy

RUN locale  # check for UTF-8
RUN apt update && apt install locales -y
RUN locale-gen it_IT it_IT.UTF-8
RUN update-locale LC_ALL=it_IT.UTF-8 LANG=it_IT.UTF-8
RUN export LANG=it_IT.UTF-8

# Set the timezone
ENV ROS_VERSION=2
ENV ROS_DISTRO=humble
ENV ROS_PYTHON_VERSION=3
ENV TZ=Europe/Rome
RUN ln -snf /usr/share/zoneinfo/$TZ /etc/localtime && echo $TZ > /etc/timezone

# Add the necessary repository and update the system packages
RUN apt install software-properties-common -y
RUN add-apt-repository universe
RUN apt update && apt install curl -y
RUN curl -sSL https://raw.githubusercontent.com/ros/rosdistro/master/ros.key -o /usr/share/keyrings/ros-archive-keyring.gpg
RUN echo "deb [arch=$(dpkg --print-architecture) signed-by=/usr/share/keyrings/ros-archive-keyring.gpg] http://packages.ros.org/ros2/ubuntu $(. /etc/os-release && echo $UBUNTU_CODENAME) main" | tee /etc/apt/sources.list.d/ros2.list > /dev/null
RUN apt update && apt upgrade -y

# Set the working directory and copy the scripts
WORKDIR /ros2_project
COPY scripts/*.sh /ros2_project/

# Make the scripts executable and execute them
RUN chmod +x ./*.sh
RUN ./install_ros2.sh
RUN ./install_microros_esp32.sh
In the directory where the Dockerfile is located, execute the following command: docker build . -t <repository_name:tag>
the output looks like this:
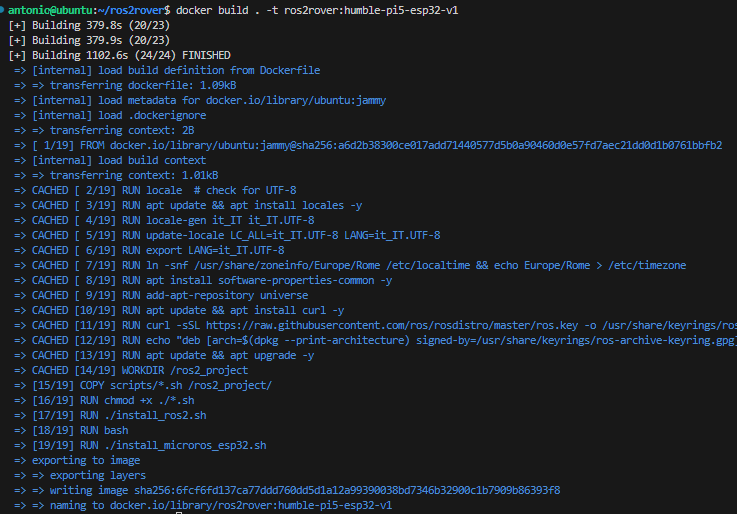
Docker image building process output
To verify the built image, use docker images to view all available Docker images.

output of docker images command
Run the ROS2 Humble Docker container
After creating the image we can use this image to run our container. Containers are lightweight, isolated environments that run applications and their dependencies, similar to virtual machines but with less overhead.
To run our container:
docker run -it \
    --name=ros2_humble \
    --net=host \
    --privileged \
    -v /dev:/dev \
    ros2rover:humble-pi5-esp32-v1 \
    bash
where:
-it: Allocates a pseudo-TTY and keeps STDIN open, allowing interaction with the container.--name=ros2_humble: Specifies the name of the container as ros2_humble--net=host: Shares the network namespace with the host, allowing the container to use the host network interface.--privileged: Runs the container in privileged mode, giving it access to all devices on the host.-v /dev:/dev: Mounts the host's/devdirectory into the container, giving the container access to all device files on the host.ros2rover:humble-pi5-esp32-v1: Specifies the name of the Docker image to use when creating the container.bash: Specifies the command to run inside the container. In this case, it starts a Bash shell.
Executing this command will result in opening a bash shell prompt inside the container in the working directory, allowing you to interact directly with the container’s environment.
Build and flash the micro-ROS int32_publisher example

working directory content inside the container
To verify functionality, we can build one of the examples included in the cloned micro-ROS repository. Here are the steps to follow:
- go into the example folder with this command:
cd micro_ros_espidf_component/examples/int32_publisher - activate the software development environment for ESP-IDF:
. $IDF_PATH/export.sh - set the target to build for (in this case, ESP32):
idf.py set-target esp32
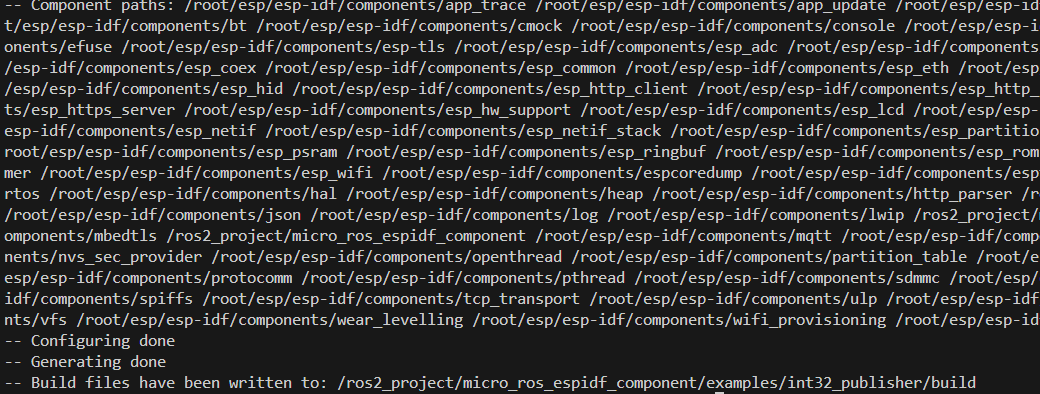
idf.py set-target esp32 free error output
- Setup the wifi connection and ip host target (Raspberry Pi5 IP):
runidf.py menuconfig, next go to micro-ROS Settings, set the IP of micro-ROS Agent IP with the host ip (to know the Raspberry Pi5 IP you can run ifconfig in the bash shell) and set the WiFi configuration with the SSID and Password of the Network where both Raspberry Pi5 and the ESP32 will be connected to.
Then save with “S” and quit with “Q”.
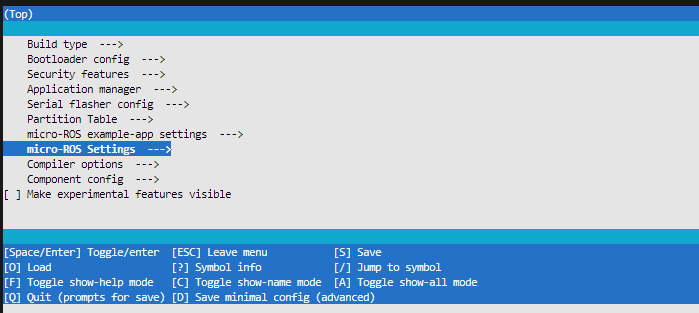
menuconfig window

micro-ROS Settings window

WiFi Configuration window
- Build the example with the command:
idf.py build
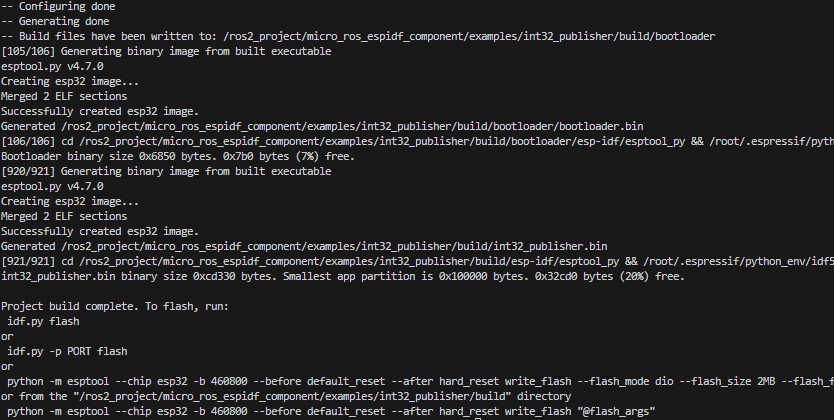
free error output of the command idf.py build
- Connect the ESP32 board to the Raspberry Pi5 using a micro-USB cable and ensure that you have the permission of read and write.
To check what is the dev name assigned to the USB port you are connecting to run this command before to connect to the port:journalctl --follow(in Raspberry Pi5 shell not in the container).
Once you know the dev name you can allow the Raspberry Pi5 to write and read using this command:sudo chmod 666 /dev/<device name>in my case the<device name>is equal tottyUSB0.

Output in journalctl when connecting the ESP32 to RaspberryPi5
- Finally, we can flash the firmware to the ESP32 board with:
idf.py flash
If you have multiple USB devices connected, you can specify the port using:idf.py -p /dev/ttyUSB0 flash
Create the micro-ROS Agent and read the message published by ESP32
The micro-ROS Agent acts as a bridge between micro-ROS nodes on the ESP32 and the ROS 2 network. To establish communication, launch the micro-ROS Agent using Docker and the appropriate image:
#udp4 specifically refers to using UDP for communication over an IPv4 network
docker run -it --rm --net=host microros/micro-ros-agent:humble udp4 --port 8888 -v6

Once you power cycle (turn off and on) the ESP32 board, you should see the following output in the micro-ROS Agent container shell:
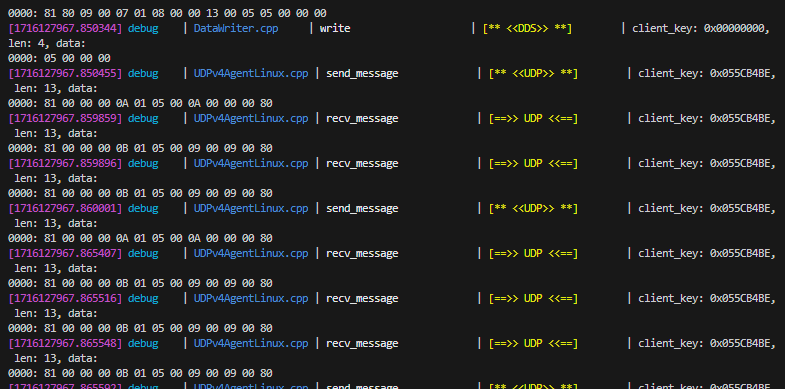
Output in the micro-ROS Agent container shell
Within the ROS2 Humble container, source the ROS2 Humble environment and then write:ros2 topic list.
This should now display the topic /freertos_int32_publisher, where the ESP32 is publishing integer (int32) data.

ros2 topic list in ROS2 Humble container
We can now read the messages published in that topic, use the following command within the ROS2 Humble container to subscribe to and display the messages published by the ESP32 on the /freertos_int32_publisher topic: ros2 topic echo /freertos_int32_publisher
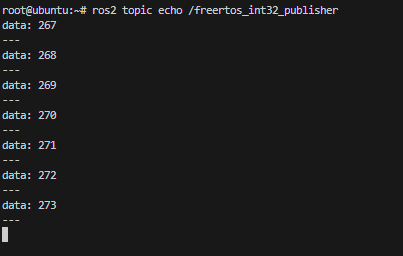
messages published by ESP32 board on /freertos_int32_publisher topic
Conclusion
If you’ve made it this far, congratulations! By following this comprehensive guide, you’ve successfully enabled communication between your Raspberry Pi 5 and an ESP32 microcontroller using ROS2 Humble and micro-ROS through Docker.
This setup facilitates a robust environment for developing and testing micro-ROS applications, leveraging the flexibility and isolation provided by Docker.
By following these steps, you can now leverage micro-ROS to bridge communication between your Raspberry Pi 5 and ESP32 for various Internet of Things (IoT) applications.
Good luck and happy coding! Don’t hesitate to experiment and push the boundaries of what’s possible with ROS2, Raspberry Pi 5, and ESP32.
Let’s connect: https://www.linkedin.com/in/antonioconsiglio/